Getting Started
Getting Started with Responsive Menu 4
Welcome to the Responsive Menu 4.0 Documentation, Are you stuck somewhere? or just want to know more about the plugin plus explore its features then you are at the right place. Here we walk you through all those aspects of the new Responsive Menu† 4.0 WordPress Menu Plugin that you must know to configure the Responsive Menu for your website.
After you have installed the Responsive Menu 4.0 plugin and have just glimpsed through the plugin. At first, you might have been a bit overwhelmed with the new interface, if you have migrated from any of the older versions. There is nothing to worry about, we have documented all the stuff that you might need to kickstart building a beautiful Responsive Menu for your website.

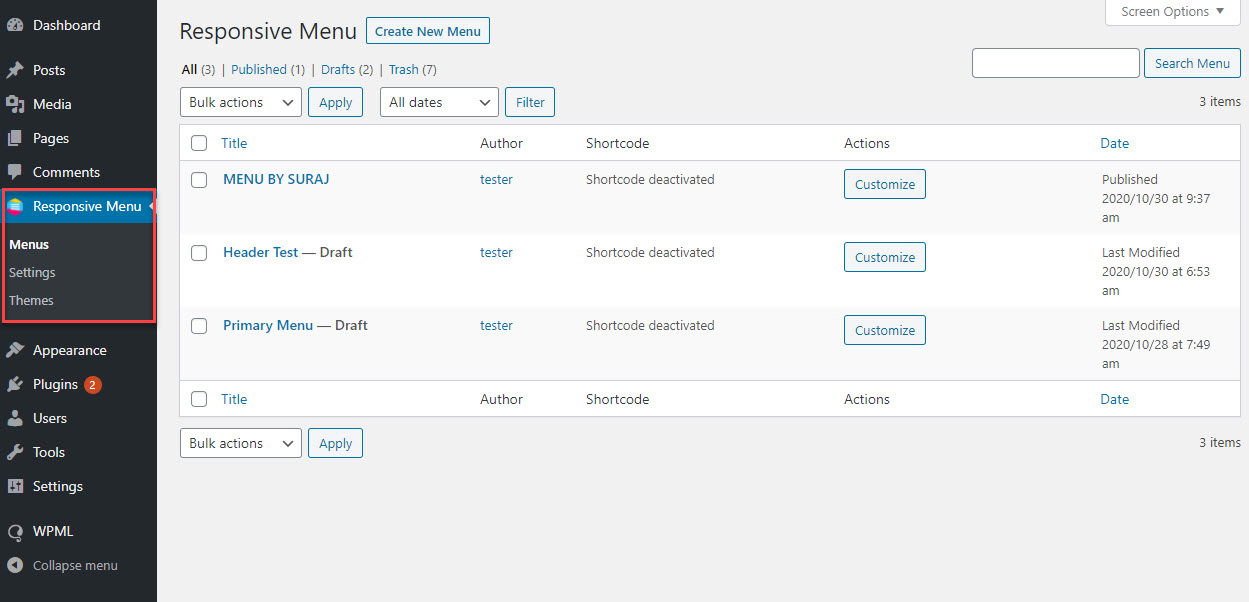
After you have successfully installed the plugin and had it activated. You would find a new Menu been created by the name Responsive Menu on the sidebar of the WordPress Admin Panel.
When you click on the Responsive Menu on the sidebar you would find three sub-menus by the name:
- Menus – This is where you can create a new Responsive Menu and customize it as per your needs with Options like Mobile Menu, Desktop Menu, Menu Styling, Header Bar, Themes, and Settings to change the menu’s appearance, behavior, text, positioning, add submenus, manage visibility across Mobile, Tablet and Desktop devices, and manage the general and advanced menu settings.
- You will find a detailed explanation of each and every menu option in the later part of this documentation series.
- Settings – In this sub-menu option, You will be presented with 3 Tabs Namely, General Tab, Advanced Tab, and Style Tab.
- General Tab: Here you will need to provide the license key of the purchased Responsive Menu Plugin for getting automatic updates. You will also have the option of performing a rollback to the previous Responsive Menu Software version if you encounter issues with the current version.
- Advanced Tab: Here you would also find advanced options like Adjusting the WP Admin Bar, Using External Files, Minifying Scripts, Option to Place scripts in the footer, Removing Dashicons, Removing FontAwesome Scripts, Removing Glyphicon Scripts, and Removing Material Icon Scripts.
- Style Tab: Here you can also add Custom CSS to make minor tweaks to some margins, paddings, or colors or even for whole new layouts and designs.
- Themes – In this Sub Menu option you have the choice to Upload a Theme or choose anyone from the already existing theme to enhance the overall look and feel of your Responsive Menu.
These three sidebar menus together are required to create a beautiful Responsive Menu for your Website. We will learn more about the Menu Customization options in the next document.
