
Responsive Menu 4.0 Overview
Responsive Menu 4.0 Overview
Before you get started with creating a New Responsive Menu for your website. First, you need to understand what each section on the Responsive Menu Plugin does and how to use it. Below you can find more on creating a New Menu and its settings.
As seen in the Getting Started Document, After installing the Responsive Menu Plugin you will be presented with a new Menu named “Responsive Menu” on the sidebar of the WordPress admin panel. It further has 3 sub-menus by the name All Menu, Settings, and Themes.
We will look into detail in each of these submenus and learn more about their functioning.
Menus
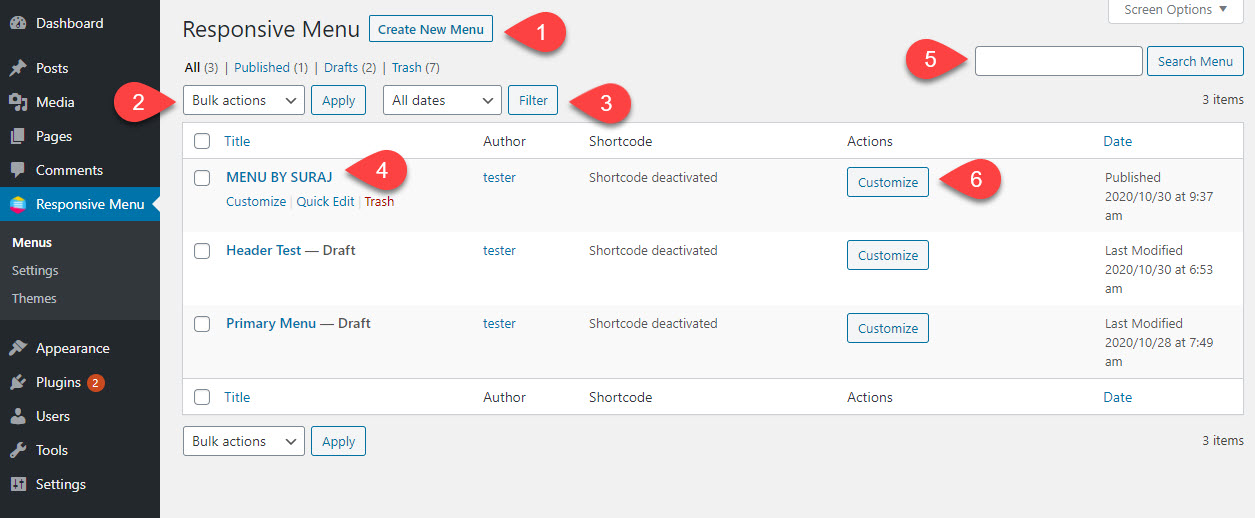
All Menu consists of the below functions. With All Menu, you can start creating your news Menu and customize it.
1. Create a New Menu
With the create new Menu Button you can add a new menu. And, Fill Menu Settings and Show/Hide the Responsive Menu as per your preferences.
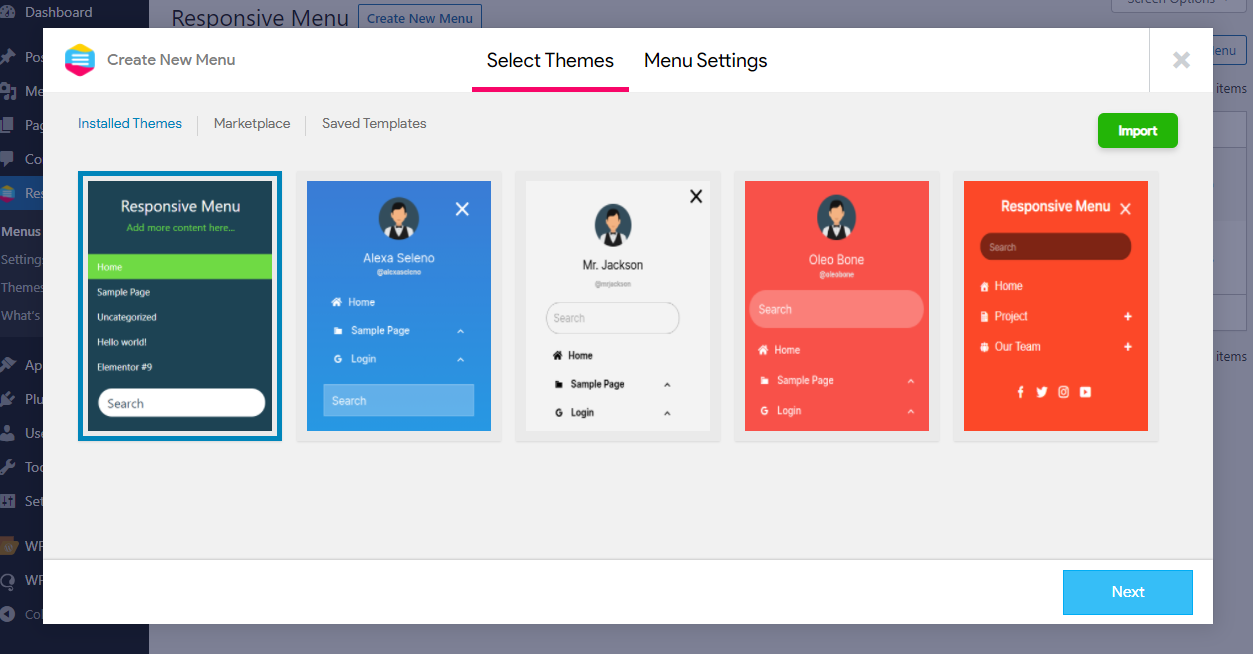
- Select Themes� – To enhance the Menu’s look and feel even further you can use some Pre-built (ready to use) themes to speed up things and step up the game. Click to know more about RM Themes.
-
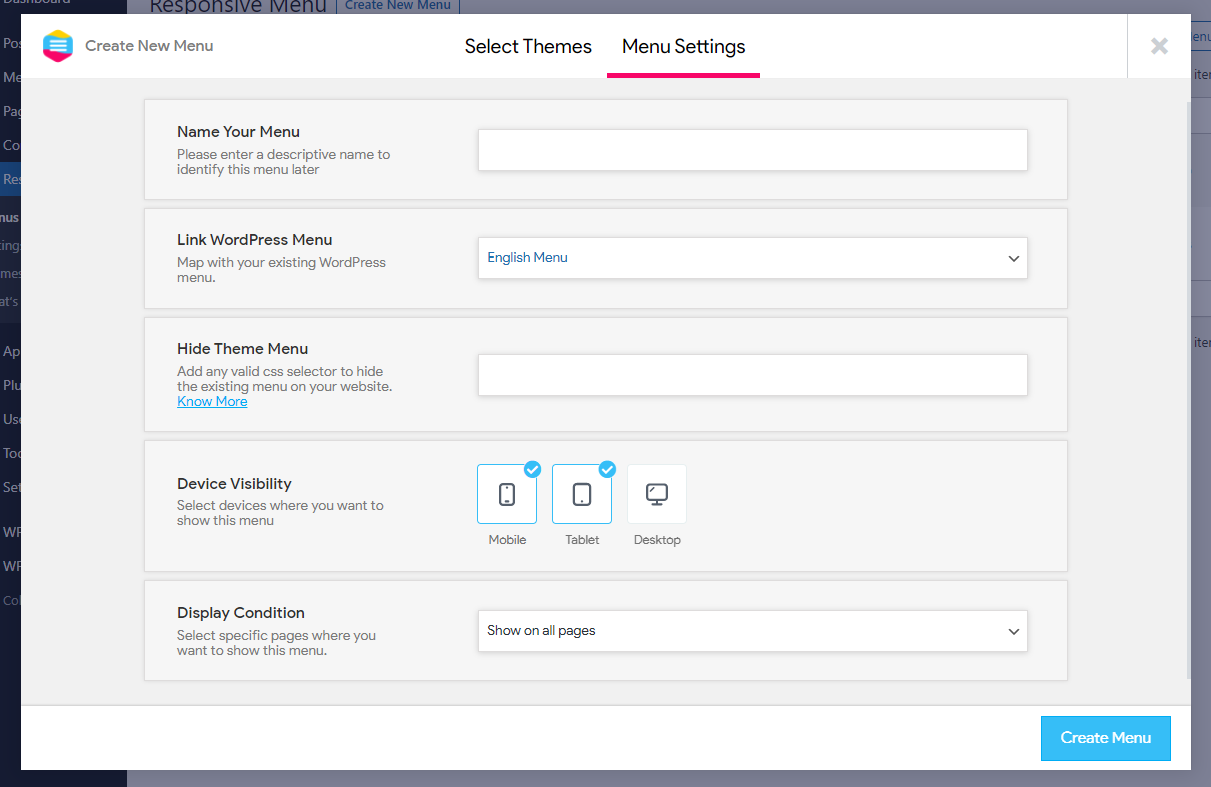
- Menu Setting
- Name Your Menu – Here you need to Enter the Menu name to identify the new Menu
- Link WordPress Menu – The original menu you would like to use from your WordPress site. If you don�t have any menus set up, you can create one now by following this official WordPress guide on creating menus in WordPress which can be found here.
- Hide Theme Menu – Use it to hide your original theme menu and display the new Responsive Menu. Click to Know More.
- Device Visibility – Here you can set the device visibility to make the menu visible on devices like Mobile, Tablet, and Desktop Devices
- Display Condition -� Choose the display conditions like
- Show on All Pages – Show the Responsive Menu on All pages of your website
- Exclude Some Pages – Exclude the Responsive Menu on Some Pages
- Include Only Pages – Include the Responsive Menu only on Pages
- Parent & child pages�� Include menu on the chosen parent and child pages
- Use as shortcode�� Include menu on a page�using a shortcode
- Menu Setting
2. Bulk Actions
With Bulk Actions, you can Edit and Delete the created Menus in Bulk. It is useful if you have more than one Menu on your website and need to quickly edit those menus.
3. Filter
With this option, you can filter the menus based on the month of creation. This again comes handly to manage when you have more than one Menu on your website.
4.� Customize, Quick Edit, and Delete Responsive Menu
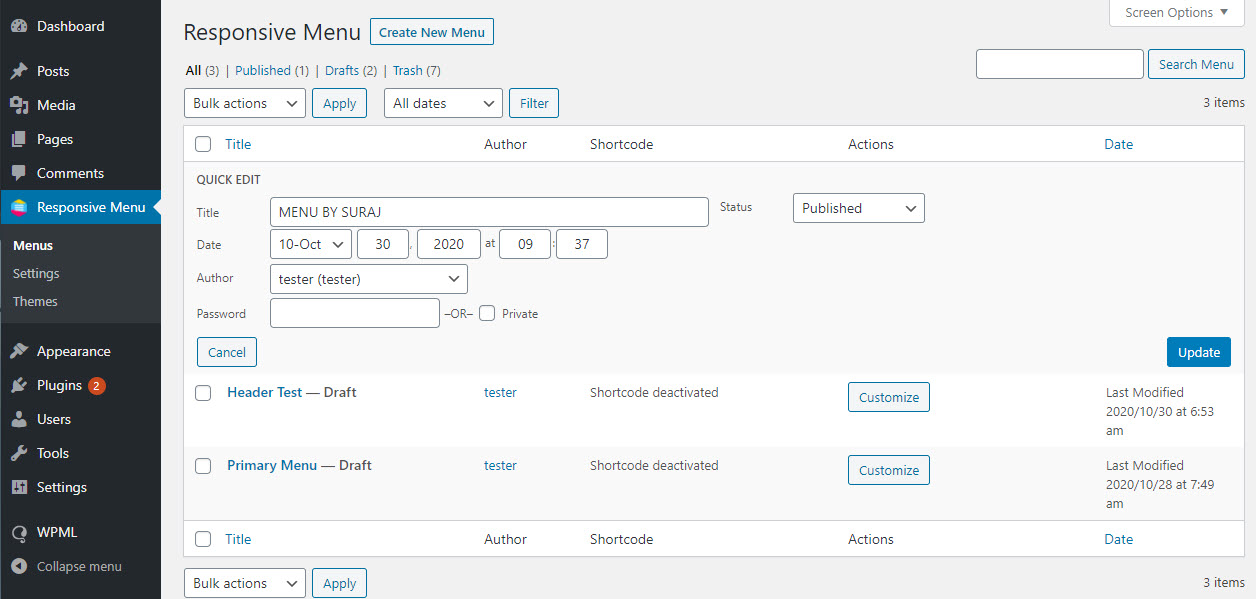
- Unlike the bulk option, here you can Customize and Quick Edit menus individually. Basically, you can Edit the Menu Name, Change the author, Manage Visibility, and do much more.
- With these customizations, you can set the type of menu, improve the appearance, manage the behavior, set the positioning, tweak the animation speeds and do a lot more in terms of technicality to make it run smoothly and is in sync with your website.
To know more about Menu Customization Click Here
5. Search Menu
With the Search Bar, you can search menus by their title to locate them and apply respective modifications if needed.
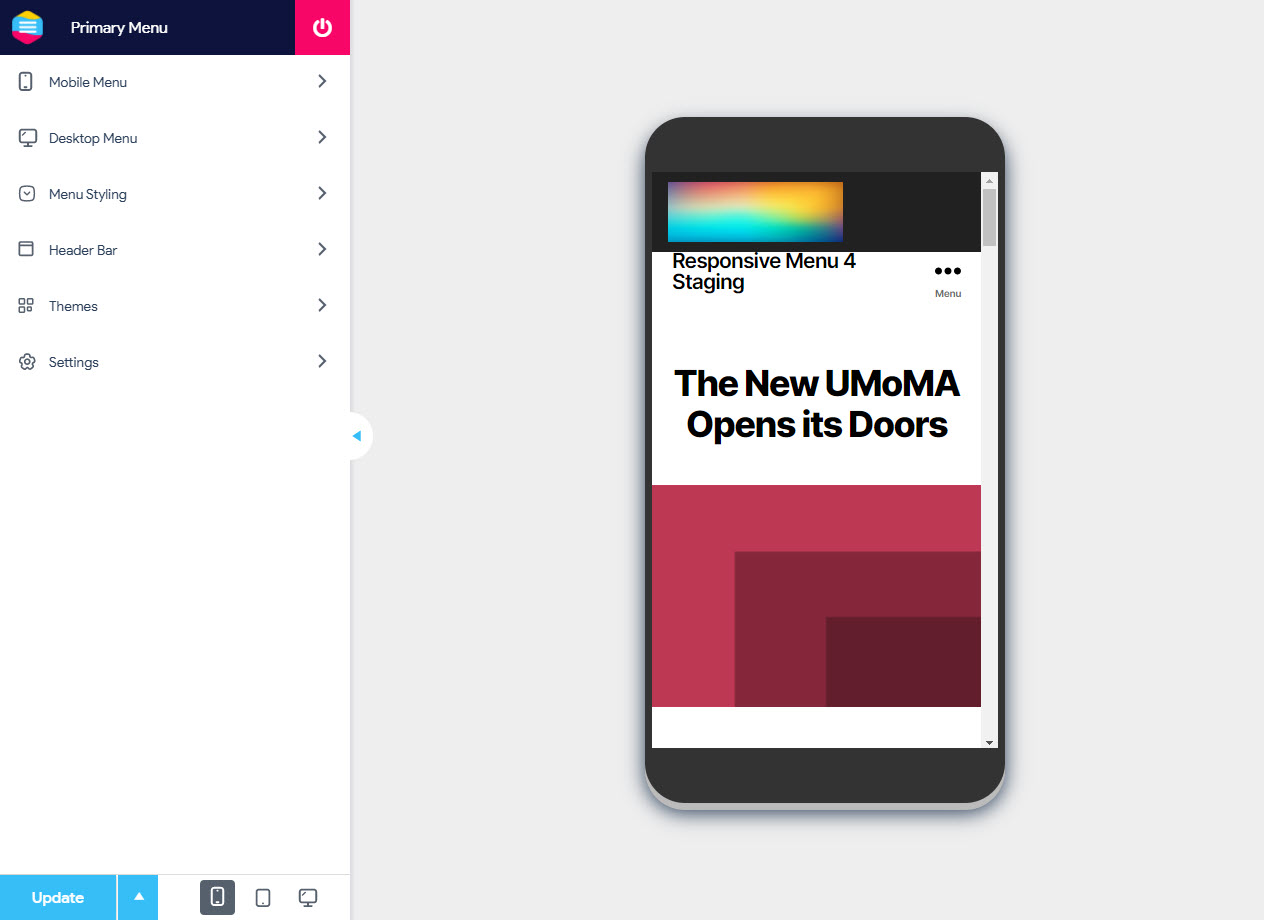
6. Menu Customization
After you have created a new menu you now have the option to customize it as per your need. With these customizations, you can set the type of menu, improve the appearance, manage the behavior, set the positioning, tweak the animation speeds and do a lot more in terms of technicality to make it run smoothly and is in sync with your website. Learn more about Menu Customization.